Measuring narrow grooves, steps, and blind holes requires a tool that balances speed with absolute accuracy. While micrometer depth gauges offer precision, their narrow bases struggle with wider spans. A premium Digimatic caliper depth gage provides the ideal middle ground. It delivers rapid, versatile measurements with a clear digital readout.
What is a Digimatic Caliper Depth Gage?
This innovative inspection tool combines the familiar sliding mechanism of a digital caliper with a specialized, wide reference base. Instead of measuring external parts, the main beam slides downward into cavities.
The hardened stainless-steel base sits securely across the opening of your workpiece. The tool displays the exact depth instantly on an easy-to-read LCD screen, resolving down to 0.01mm.
Key Benefits for Everyday Inspections
Integrating this digital sliding gauge into your machine shop offers immediate advantages:
Extra-Wide Base Span: The broad base easily bridges large holes and wide slots that swallow standard gauges.
Rapid Slider Action: It allows you to check multiple depths across a part far quicker than turning a micrometer thimble.
Absolute Encoder Technology: The system tracks its origin point reliably, preventing over-speed errors during fast movements.
Zero-Setting Anywhere: You can establish relative zero positions effortlessly to measure steps or comparative differences.
Pro Tips for Flawless Operation
Maintenance Tip: Always clean the sliding beam and the bottom of the base before use. Dirt buildup along the track creates friction that alters your digital readings.
Press the wide base firmly against your reference surface before sliding the blade down. Ensure the blade enters the cavity at a perfect 90-degree angle to avoid tilting errors.
Stop struggling with awkward setups on large workpieces. Invest in a Digimatic caliper depth gage today to maximize your inspection speed and guarantee flawless accuracy.
Base 100x6.5mm for range 0 to 300mm
Base 250x10mm for range 600 to 1000mm
IP67 protection
Measuring narrow grooves, steps, and blind holes requires a tool that balances speed with absolute accuracy. While micrometer depth gauges offer precision, their narrow bases struggle with wider spans. A premium Digimatic caliper depth gage provides the ideal middle ground. It delivers rapid, versatile measurements with a clear digital readout.
What is a Digimatic Caliper Depth Gage?
This innovative inspection tool combines the familiar sliding mechanism of a digital caliper with a specialized, wide reference base. Instead of measuring external parts, the main beam slides downward into cavities.
The hardened stainless-steel base sits securely across the opening of your workpiece. The tool displays the exact depth instantly on an easy-to-read LCD screen, resolving down to 0.01mm.
Key Benefits for Everyday Inspections
Integrating this digital sliding gauge into your machine shop offers immediate advantages:
Extra-Wide Base Span: The broad base easily bridges large holes and wide slots that swallow standard gauges.
Rapid Slider Action: It allows you to check multiple depths across a part far quicker than turning a micrometer thimble.
Absolute Encoder Technology: The system tracks its origin point reliably, preventing over-speed errors during fast movements.
Zero-Setting Anywhere: You can establish relative zero positions effortlessly to measure steps or comparative differences.
Pro Tips for Flawless Operation
Maintenance Tip: Always clean the sliding beam and the bottom of the base before use. Dirt buildup along the track creates friction that alters your digital readings.
Press the wide base firmly against your reference surface before sliding the blade down. Ensure the blade enters the cavity at a perfect 90-degree angle to avoid tilting errors.
Stop struggling with awkward setups on large workpieces. Invest in a Digimatic caliper depth gage today to maximize your inspection speed and guarantee flawless accuracy.
Base 100x6.5mm for range 0 to 300mm
Base 250x10mm for range 600 to 1000mm
IP67 protection
The Battery-Free Standard for Reliable Depth Measurement
Modern machine shops feature digital screens everywhere, yet electronic tools have a major weakness. They fail the moment their batteries die or oil seeps into the sensors. A premium Vernier depth gage eliminates this vulnerability completely. This classic mechanical tool delivers flawless, lifelong precision without relying on a single wire.
What is a Vernier Depth Gage?
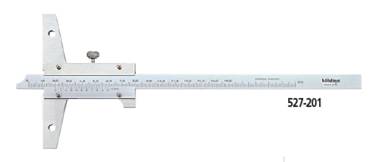
A Vernier depth gage is a manual inspection tool designed to measure the depth of holes, slots, and steps. It features a wide, precision-ground base that bridges the opening of your workpiece.
A graduated main beam slides through this base to reach the bottom of the cavity. By aligning the main scale with the fine vernier scale, you can read dimensions accurately down to 0.02mm.
Key Advantages for Rugged Workshops
Choosing a traditional manual depth gauge provides distinct benefits for your daily workflow:
Total Reliability: The completely mechanical design ignores water, cutting fluid, and magnetic fields.
Zero Calibration Drift: It maintains its physical scale integrity over decades of continuous shop use.
Wide Reference Base: The hardened steel base prevents rocking to ensure stable, parallel measurements.
Locking Screw Precision: A knurled thumb screw clamps the slider securely to preserve your reading for later checking.
Pro Tips for Flawless Reading Accuracy
Reading Tip: Always look at the vernier scale from a direct, straight-on perspective. Viewing the lines from an angle creates parallax errors that skew your final data.
Hold the base firmly against the top reference surface of your part. Slide the main beam down gently until it makes solid contact with the bottom. Lock the slider, read your whole millimeters first, and then find the matching vernier line.
Stop worrying about battery failures mid-inspection. Invest in a durable Vernier depth gage today to bring timeless, uninterrupted accuracy to your workshop.
Base 100x6.5mm for range 0 to 300mm
Base 250x10mm for range 600 to 1000mm
The Battery-Free Standard for Reliable Depth Measurement
Modern machine shops feature digital screens everywhere, yet electronic tools have a major weakness. They fail the moment their batteries die or oil seeps into the sensors. A premium Vernier depth gage eliminates this vulnerability completely. This classic mechanical tool delivers flawless, lifelong precision without relying on a single wire.
What is a Vernier Depth Gage?
A Vernier depth gage is a manual inspection tool designed to measure the depth of holes, slots, and steps. It features a wide, precision-ground base that bridges the opening of your workpiece.
A graduated main beam slides through this base to reach the bottom of the cavity. By aligning the main scale with the fine vernier scale, you can read dimensions accurately down to 0.02mm.
Key Advantages for Rugged Workshops
Choosing a traditional manual depth gauge provides distinct benefits for your daily workflow:
Total Reliability: The completely mechanical design ignores water, cutting fluid, and magnetic fields.
Zero Calibration Drift: It maintains its physical scale integrity over decades of continuous shop use.
Wide Reference Base: The hardened steel base prevents rocking to ensure stable, parallel measurements.
Locking Screw Precision: A knurled thumb screw clamps the slider securely to preserve your reading for later checking.
Pro Tips for Flawless Reading Accuracy
Reading Tip: Always look at the vernier scale from a direct, straight-on perspective. Viewing the lines from an angle creates parallax errors that skew your final data.
Hold the base firmly against the top reference surface of your part. Slide the main beam down gently until it makes solid contact with the bottom. Lock the slider, read your whole millimeters first, and then find the matching vernier line.
Stop worrying about battery failures mid-inspection. Invest in a durable Vernier depth gage today to bring timeless, uninterrupted accuracy to your workshop.
Base 100x6.5mm for range 0 to 300mm
Base 250x10mm for range 600 to 1000mm
In precision manufacturing, standard calipers often fail to deliver the accuracy you need for deep recesses. When a fraction of a millimeter determines whether a part passes inspection, professionals reach for a micrometer depth gage. This essential tool provides the ultimate stability and micro-precise accuracy for checking hidden features.
What is a Micrometer Depth Gage?
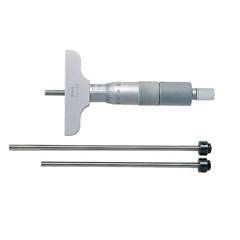
A micrometer depth gage is a specialized mechanical instrument designed to measure the depth of blind holes, slots, and steps. Unlike external micrometers that clamp around a part, this tool utilizes a wide, precision-ground flat base.
The base spans across the opening of the cavity. A calibrated micrometer screw then drives a measuring rod downward until it hits the bottom surface to give you an incredibly precise reading.
Key Benefits for Precision Machining
Integrating this mechanical powerhouse into your quality control routine offers massive advantages:
Interchangeable Rods: A single micrometer head accommodates varying rod lengths to measure a massive range of depths.
Unmatched Mechanical Stability: The wide, hardened steel base eliminates rocking to prevent measurement errors.
Ratchet Thimble Consistency: The built-in ratchet mechanism applies identical measuring force during every single test.
High Resolution: It easily resolves measurements down to 0.01mm or 0.001 inches for flawless accuracy.
Pro Tips for Flawless Depth Measurement
Setup Tip: Always check your zero-point on a certified master surface plate whenever you change the measuring rod. A tiny speck of dust on the rod shoulder will ruin your calibration.
Hold the base firmly against the top surface of your workpiece. Rotate the ratchet thimble gently until it clicks three times, then lock the spindle to read your final dimension.
Stop guessing on your critical depth dimensions. Invest in a premium micrometer depth gage today to achieve flawless accuracy on every project.
Interchangeable rod typeenable wide range measurement
Rod diameter 4mm
Base 63.5x16mm or 101.6 x16mm
In precision manufacturing, standard calipers often fail to deliver the accuracy you need for deep recesses. When a fraction of a millimeter determines whether a part passes inspection, professionals reach for a micrometer depth gage. This essential tool provides the ultimate stability and micro-precise accuracy for checking hidden features.
What is a Micrometer Depth Gage?
A micrometer depth gage is a specialized mechanical instrument designed to measure the depth of blind holes, slots, and steps. Unlike external micrometers that clamp around a part, this tool utilizes a wide, precision-ground flat base.
The base spans across the opening of the cavity. A calibrated micrometer screw then drives a measuring rod downward until it hits the bottom surface to give you an incredibly precise reading.
Key Benefits for Precision Machining
Integrating this mechanical powerhouse into your quality control routine offers massive advantages:
Interchangeable Rods: A single micrometer head accommodates varying rod lengths to measure a massive range of depths.
Unmatched Mechanical Stability: The wide, hardened steel base eliminates rocking to prevent measurement errors.
Ratchet Thimble Consistency: The built-in ratchet mechanism applies identical measuring force during every single test.
High Resolution: It easily resolves measurements down to 0.01mm or 0.001 inches for flawless accuracy.
Pro Tips for Flawless Depth Measurement
Setup Tip: Always check your zero-point on a certified master surface plate whenever you change the measuring rod. A tiny speck of dust on the rod shoulder will ruin your calibration.
Hold the base firmly against the top surface of your workpiece. Rotate the ratchet thimble gently until it clicks three times, then lock the spindle to read your final dimension.
Stop guessing on your critical depth dimensions. Invest in a premium micrometer depth gage today to achieve flawless accuracy on every project.
Interchangeable rod typeenable wide range measurement
Rod diameter 4mm
Base 63.5x16mm or 101.6 x16mm
Standard depth gauges work beautifully on small holes and narrow slots. However, you will inevitably encounter wide bores or large cavities that swallow your tool's standard base. A high-quality set of extension bases for depth gage setups solves this common workshop bottleneck. They expand your measurement footprint without compromising your accuracy.
What are Depth Gage Extension Bases?
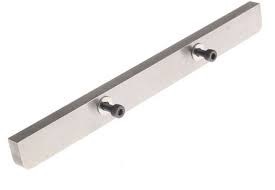
Extension bases are precision-ground metal attachments designed to extend the span of your existing depth micrometer or caliper. They bolt directly onto the bottom of your tool's original base.
By widening the contact surface, they allow your gauge to sit securely across massive openings. This accessory transforms a standard inspection tool into a highly versatile heavy-duty gauge.
Key Advantages for Large-Scale Machining
Adding these precision extensions to your tool chest provides immediate benefits:
Bridges Large Spans: They allow you to measure deep recesses on wide engine blocks or large flanges easily.
Precision-Ground Alignment: Manufacturers lapped the mounting surfaces perfectly flat to maintain absolute parallelism.
Cost-Effective Versatility: They eliminate the need to purchase multiple expensive, oversized depth gauges.
Rock-Solid Stability: The added weight and width prevent rocking errors during critical quality checks.
Pro Tips for Flawless Installation
Installation Tip: Clean both the tool base and the extension mounting surface meticulously before fastening them together. A single trapped microscopic burr will tilt your gauge and ruin your calibration.
After mounting the extension base, always re-zero your depth gauge on a certified master surface plate. This practice ensures your interchangeable rods still read perfectly true across the wider span.
Stop letting wide workpiece cavities stall your production line. Invest in premium extension bases for depth gage kits today to maximize your shop's measurement capabilities.
Standard depth gauges work beautifully on small holes and narrow slots. However, you will inevitably encounter wide bores or large cavities that swallow your tool's standard base. A high-quality set of extension bases for depth gage setups solves this common workshop bottleneck. They expand your measurement footprint without compromising your accuracy.
What are Depth Gage Extension Bases?
Extension bases are precision-ground metal attachments designed to extend the span of your existing depth micrometer or caliper. They bolt directly onto the bottom of your tool's original base.
By widening the contact surface, they allow your gauge to sit securely across massive openings. This accessory transforms a standard inspection tool into a highly versatile heavy-duty gauge.
Key Advantages for Large-Scale Machining
Adding these precision extensions to your tool chest provides immediate benefits:
Bridges Large Spans: They allow you to measure deep recesses on wide engine blocks or large flanges easily.
Precision-Ground Alignment: Manufacturers lapped the mounting surfaces perfectly flat to maintain absolute parallelism.
Cost-Effective Versatility: They eliminate the need to purchase multiple expensive, oversized depth gauges.
Rock-Solid Stability: The added weight and width prevent rocking errors during critical quality checks.
Pro Tips for Flawless Installation
Installation Tip: Clean both the tool base and the extension mounting surface meticulously before fastening them together. A single trapped microscopic burr will tilt your gauge and ruin your calibration.
After mounting the extension base, always re-zero your depth gauge on a certified master surface plate. This practice ensures your interchangeable rods still read perfectly true across the wider span.
Stop letting wide workpiece cavities stall your production line. Invest in premium extension bases for depth gage kits today to maximize your shop's measurement capabilities.
Precision Inspection: The Machinist’s Guide to Bench Centers
Measuring concentricity on long cylindrical parts presents tough challenges on the shop floor. V-blocks often fail to support shafts evenly during rotation checks. Heavy-duty bench centers solve this metrology challenge by holding workpieces securely between center points for precise runout inspection.
This guide explains how bench centers elevate quality control in modern machine shops.
What Are Bench Centers?
Bench centers are heavy metrology fixtures featuring a ground cast iron base and two adjustable headstocks.
Technicians mount cylindrical workpieces between hardened steel centers. When combined with a dial indicator, this setup allows inspectors to measure total radial runout, wobble, and shaft eccentricity accurately.
Key Advantages for Quality Control
Adding bench centers to your inspection room delivers immediate operational benefits:
High Structural Rigidity: Heavy cast iron bases absorb vibrations to ensure stable measurement readings.
Precise Alignment: Parallel precision-ground T-slots keep headstocks aligned across the bed.
Quick Adjustments: Spring-loaded center spindles allow rapid loading and unloading of test parts.
Precision Inspection: The Machinist’s Guide to Bench Centers
Measuring concentricity on long cylindrical parts presents tough challenges on the shop floor. V-blocks often fail to support shafts evenly during rotation checks. Heavy-duty bench centers solve this metrology challenge by holding workpieces securely between center points for precise runout inspection.
This guide explains how bench centers elevate quality control in modern machine shops.
What Are Bench Centers?
Bench centers are heavy metrology fixtures featuring a ground cast iron base and two adjustable headstocks.
Technicians mount cylindrical workpieces between hardened steel centers. When combined with a dial indicator, this setup allows inspectors to measure total radial runout, wobble, and shaft eccentricity accurately.
Key Advantages for Quality Control
Adding bench centers to your inspection room delivers immediate operational benefits:
High Structural Rigidity: Heavy cast iron bases absorb vibrations to ensure stable measurement readings.
Precise Alignment: Parallel precision-ground T-slots keep headstocks aligned across the bed.
Quick Adjustments: Spring-loaded center spindles allow rapid loading and unloading of test parts.
Reliable Accuracy with the Indicator Calibration Tester UDT-2
Maintaining precision in your workshop requires regular equipment checks. Therefore, the Indicator Calibration Tester UDT-2 is an essential tool for every quality lab. This device allows you to verify the accuracy of dial and digital indicators with ease. Consequently, you can ensure your tools meet strict standards before they hit the production floor.
Why Calibration Matters
A faulty indicator leads to expensive manufacturing errors. For instance, even a small deviation can ruin a high-tolerance part. Furthermore, regular testing helps you track the wear and tear of your gauges. Because the UDT-2 provides a stable and controlled environment, it eliminates manual measurement variables. As a result, you gain total confidence in your daily inspection results.
Key Features of the UDT-2
This tester offers several functional benefits for modern metrology technicians.
First, the rugged design ensures long-term stability and durability.
Next, the precision micrometer head provides high-resolution displacement.
Additionally, the adjustable bracket fits various indicator stem sizes.
Finally, the compact footprint saves valuable space on your workbench.
Improve Your Quality Workflow
Moreover, the UDT-2 simplifies the entire verification process. Similarly, it allows your team to perform routine maintenance in-house rather than outsourcing. Thus, you reduce downtime and save on service costs. In conclusion, this tester is a smart investment for any facility that relies on accurate dial readings.
Don't let unverified tools compromise your reputation. Instead, use a professional tester to maintain your competitive edge. Upgrade your calibration routine today with the reliable UDT-2 system.
The Calibration Tester is specially designed to
calibrate short range dial indicators, dial test
indicators, and electronic gage heads.
Universal bracket accepts any dial indicator,
dial test indicator or electronic gage without
any additional accessory.
Reliable Accuracy with the Indicator Calibration Tester UDT-2
Maintaining precision in your workshop requires regular equipment checks. Therefore, the Indicator Calibration Tester UDT-2 is an essential tool for every quality lab. This device allows you to verify the accuracy of dial and digital indicators with ease. Consequently, you can ensure your tools meet strict standards before they hit the production floor.
Why Calibration Matters
A faulty indicator leads to expensive manufacturing errors. For instance, even a small deviation can ruin a high-tolerance part. Furthermore, regular testing helps you track the wear and tear of your gauges. Because the UDT-2 provides a stable and controlled environment, it eliminates manual measurement variables. As a result, you gain total confidence in your daily inspection results.
Key Features of the UDT-2
This tester offers several functional benefits for modern metrology technicians.
First, the rugged design ensures long-term stability and durability.
Next, the precision micrometer head provides high-resolution displacement.
Additionally, the adjustable bracket fits various indicator stem sizes.
Finally, the compact footprint saves valuable space on your workbench.
Improve Your Quality Workflow
Moreover, the UDT-2 simplifies the entire verification process. Similarly, it allows your team to perform routine maintenance in-house rather than outsourcing. Thus, you reduce downtime and save on service costs. In conclusion, this tester is a smart investment for any facility that relies on accurate dial readings.
Don't let unverified tools compromise your reputation. Instead, use a professional tester to maintain your competitive edge. Upgrade your calibration routine today with the reliable UDT-2 system.
The Calibration Tester is specially designed to
calibrate short range dial indicators, dial test
indicators, and electronic gage heads.
Universal bracket accepts any dial indicator,
dial test indicator or electronic gage without
any additional accessory.
Mastering the Caliper Checker: Essential Guide for Precision Measurement
Precise measurements keep manufacturing quality high. Daily wear affects measuring tools like digital, dial, or vernier calipers. Over time, slight misalignments lead to costly product errors. A caliper checker provides the fastest way to verify tool accuracy and maintain tight tolerances.
What Is a Caliper Checker?
A caliper checker is a specialized calibration block. It features hardened steel reference surfaces set at precise intervals. Machinists use this equipment to test both internal and external jaws quickly. Unlike standard gauge blocks, the checker holds multiple steps in a single compact frame. This design speeds up daily inspection routines significantly.
Why Caliper Calibration Matters
Tool drift happens naturally during normal workshop use. Dropping a tool or measuring abrasive materials alters jaw parallelity. A trusted calibration system delivers three core operational benefits:
Reduces Scrap: Catching inaccurate tools early prevents whole batches of defective parts.
Ensures Compliance: Regular checks satisfy ISO 9001 quality management requirements.
Extends Tool Life: Early detection of wear helps technicians repair tools before permanent damage occurs.
How to Use a Caliper Checker
Calibrating your measuring tools takes less than two minutes:
Clean the Surfaces: Wipe the checker and caliper jaws with a micro-fiber cloth. Remove all dust, oil, and metal shavings.
Zero the Caliper: Close the jaws fully and zero your digital scale.
Measure Reference Steps: Insert the caliper jaws into the checker's designated slots. Compare the digital readout against the reference length stamped on the block.
Log the Results: Record any variance in your maintenance software to track accuracy trends over time.
Maintenance Tips for Maximum Accuracy
Keep your equipment in peak condition with simple habits. Store the reference block in a protective case when not in use. Apply a thin layer of anti-rust oil after every shift. Keep the tool away from direct sunlight and extreme temperatures, as heat causes thermal expansion.
Investing in a reliable calibration routine protects your production quality. Check your measurement tools daily to maintain high manufacturing standards across every project.
Enable efficient setting and inspection of caliper and height gages
Mastering the Caliper Checker: Essential Guide for Precision Measurement
Precise measurements keep manufacturing quality high. Daily wear affects measuring tools like digital, dial, or vernier calipers. Over time, slight misalignments lead to costly product errors. A caliper checker provides the fastest way to verify tool accuracy and maintain tight tolerances.
What Is a Caliper Checker?
A caliper checker is a specialized calibration block. It features hardened steel reference surfaces set at precise intervals. Machinists use this equipment to test both internal and external jaws quickly. Unlike standard gauge blocks, the checker holds multiple steps in a single compact frame. This design speeds up daily inspection routines significantly.
Why Caliper Calibration Matters
Tool drift happens naturally during normal workshop use. Dropping a tool or measuring abrasive materials alters jaw parallelity. A trusted calibration system delivers three core operational benefits:
Reduces Scrap: Catching inaccurate tools early prevents whole batches of defective parts.
Ensures Compliance: Regular checks satisfy ISO 9001 quality management requirements.
Extends Tool Life: Early detection of wear helps technicians repair tools before permanent damage occurs.
How to Use a Caliper Checker
Calibrating your measuring tools takes less than two minutes:
Clean the Surfaces: Wipe the checker and caliper jaws with a micro-fiber cloth. Remove all dust, oil, and metal shavings.
Zero the Caliper: Close the jaws fully and zero your digital scale.
Measure Reference Steps: Insert the caliper jaws into the checker's designated slots. Compare the digital readout against the reference length stamped on the block.
Log the Results: Record any variance in your maintenance software to track accuracy trends over time.
Maintenance Tips for Maximum Accuracy
Keep your equipment in peak condition with simple habits. Store the reference block in a protective case when not in use. Apply a thin layer of anti-rust oil after every shift. Keep the tool away from direct sunlight and extreme temperatures, as heat causes thermal expansion.
Investing in a reliable calibration routine protects your production quality. Check your measurement tools daily to maintain high manufacturing standards across every project.
Enable efficient setting and inspection of caliper and height gages
Ultimate Precision: Check Master High Accuracy Guide
Maintaining absolute accuracy across metrology equipment remains a critical challenge for quality labs. Over time, mechanical wear and thermal shifts cause coordinate measuring machines (CMMs) to drift. The Check Master High Accuracy calibration standard solves this problem by offering a master reference to verify multi-axis measuring systems.
This guide explores how this high-precision master block elevates quality control across modern inspection facilities.
What Is the Check Master High Accuracy?
The Check Master High Accuracy is a rigid metrology standard featuring stacked ceramic or steel gauge blocks.
Engineers ground these gauge blocks to sub-micron tolerances along a rigid steel frame. Technicians use these reference steps to test and calibrate CMMs, height gauges, and bore measuring instruments across vertical and horizontal planes.
Key Advantages for Metrology Labs
Integrating a high-accuracy master block into your inspection routine offers clear operational benefits:
Sub-Micron Precision: Delivers ultra-tight length step accuracy down to 0.0005 mm.
Dual-Direction Testing: Measures both top and bottom step surfaces without moving the unit.
Thermal Stability: Specially treated materials minimize dimensional expansion caused by ambient temperature changes.
ISO Traceability: Provides clear calibration chains required for strict ISO/IEC 17025 audit compliance.
Common Quality Control Applications
Metrology technicians and calibration specialists rely on the Check Master for critical verification tasks:
CMM Accuracy Verification: Check linear displacement accuracy and volumetric errors on coordinate measuring machines.
Height Gauge Calibration: Calibrate digital and manual height gauges across their full vertical travel range.
Machine Tool Inspection: Verify positioning accuracy on CNC machining centers and precision grinders.
In-House Quality Audits: Perform routine interval checks to prevent measurement drift between formal calibrations.
How to Perform a Calibration Check in 4 Steps
Follow these basic steps to ensure accurate machine verification:
Clean the Master Block: Wipe all gauge faces with lint-free wipes and alcohol.
Thermal Equalization: Allow the block to acclimate to your lab's ambient temperature.
Mount the Probe: Align your CMM or height gauge probe square to the step surfaces.
Record Deviations: Take sequential point measurements along the steps and compare values to certified reference data.
Final Thoughts
The Check Master High Accuracy protects your facility from costly measurement errors. By verifying tool performance in-house, this durable standard guarantees consistent manufacturing quality.
Designed to check accuracy of table movement of machine tools and calibrate CMM
Can used in either vertical or horizontal
Ultimate Precision: Check Master High Accuracy Guide
Maintaining absolute accuracy across metrology equipment remains a critical challenge for quality labs. Over time, mechanical wear and thermal shifts cause coordinate measuring machines (CMMs) to drift. The Check Master High Accuracy calibration standard solves this problem by offering a master reference to verify multi-axis measuring systems.
This guide explores how this high-precision master block elevates quality control across modern inspection facilities.
What Is the Check Master High Accuracy?
The Check Master High Accuracy is a rigid metrology standard featuring stacked ceramic or steel gauge blocks.
Engineers ground these gauge blocks to sub-micron tolerances along a rigid steel frame. Technicians use these reference steps to test and calibrate CMMs, height gauges, and bore measuring instruments across vertical and horizontal planes.
Key Advantages for Metrology Labs
Integrating a high-accuracy master block into your inspection routine offers clear operational benefits:
Sub-Micron Precision: Delivers ultra-tight length step accuracy down to 0.0005 mm.
Dual-Direction Testing: Measures both top and bottom step surfaces without moving the unit.
Thermal Stability: Specially treated materials minimize dimensional expansion caused by ambient temperature changes.
ISO Traceability: Provides clear calibration chains required for strict ISO/IEC 17025 audit compliance.
Common Quality Control Applications
Metrology technicians and calibration specialists rely on the Check Master for critical verification tasks:
CMM Accuracy Verification: Check linear displacement accuracy and volumetric errors on coordinate measuring machines.
Height Gauge Calibration: Calibrate digital and manual height gauges across their full vertical travel range.
Machine Tool Inspection: Verify positioning accuracy on CNC machining centers and precision grinders.
In-House Quality Audits: Perform routine interval checks to prevent measurement drift between formal calibrations.
How to Perform a Calibration Check in 4 Steps
Follow these basic steps to ensure accurate machine verification:
Clean the Master Block: Wipe all gauge faces with lint-free wipes and alcohol.
Thermal Equalization: Allow the block to acclimate to your lab's ambient temperature.
Mount the Probe: Align your CMM or height gauge probe square to the step surfaces.
Record Deviations: Take sequential point measurements along the steps and compare values to certified reference data.
Final Thoughts
The Check Master High Accuracy protects your facility from costly measurement errors. By verifying tool performance in-house, this durable standard guarantees consistent manufacturing quality.
Designed to check accuracy of table movement of machine tools and calibrate CMM
Can used in either vertical or horizontal
Essential Precision: The Metrologist’s Guide to Check Master
Maintaining exact accuracy across inspection tools remains a constant priority for manufacturing facilities. Daily shop operations cause measuring equipment to drift from original factory specifications. The Check Master calibration standard resolves this quality risk by offering a master step gauge to test multi-axis measuring systems quickly.
This guide explains how integrating a Check Master upgrades quality assurance in modern inspection labs.
What Is a Check Master?
A Check Master is a rigid metrology reference instrument constructed with permanently mounted gauge blocks.
Engineers ground these precision blocks at fixed intervals along a heavy steel housing. Technicians use these reference steps to inspect coordinate measuring machines (CMMs), height gauges, and bore measuring instruments across vertical and horizontal planes.
Key Operational Advantages
Adding a master step gauge to your calibration room provides clear technical benefits:
Rigid Construction: High-grade steel housing protects internal gauge blocks against deflection and shop floor damage.
Dual-Direction Reference: Measures both top and bottom step faces without altering tool position.
Fast Calibration Cycles: Reduces CMM verification times compared to wringing individual gauge blocks.
ISO Audit Compliance: Delivers clear measurement traceability required for strict ISO/IEC quality standards.
Common Quality Control Applications
Metrology technicians rely on master step gauges for vital calibration duties:
CMM Accuracy Verification: Verify linear position accuracy and volumetric performance on coordinate measuring machines.
Height Gauge Calibration: Test height gauge accuracy across full travel distances in minutes.
Routine Facility Audits: Conduct interval checks between official lab calibrations to prevent quality errors.
How to Conduct a Calibration Check in 4 Steps
Follow these basic steps to ensure accurate tool verification:
Clean the Working Surfaces: Wipe step faces gently using isopropyl alcohol and lint-free clothes.
Acclimate the Unit: Allow the gauge to equalize with your inspection room's ambient temperature.
Align the Probe: Position your measuring probe square to the step surfaces.
Compare Test Readings: Record sequential point measurements and compare results against certified values.
Final Thoughts
The Check Master prevents costly measurement errors across your manufacturing process. By verifying equipment performance in-house, this durable reference standard protects product quality and maintains total customer confidence.
Designed to check accuracy of table movement of machine tools and calibrate CMM
Can used in either vertical or horizontal
Essential Precision: The Metrologist’s Guide to Check Master
Maintaining exact accuracy across inspection tools remains a constant priority for manufacturing facilities. Daily shop operations cause measuring equipment to drift from original factory specifications. The Check Master calibration standard resolves this quality risk by offering a master step gauge to test multi-axis measuring systems quickly.
This guide explains how integrating a Check Master upgrades quality assurance in modern inspection labs.
What Is a Check Master?
A Check Master is a rigid metrology reference instrument constructed with permanently mounted gauge blocks.
Engineers ground these precision blocks at fixed intervals along a heavy steel housing. Technicians use these reference steps to inspect coordinate measuring machines (CMMs), height gauges, and bore measuring instruments across vertical and horizontal planes.
Key Operational Advantages
Adding a master step gauge to your calibration room provides clear technical benefits:
Rigid Construction: High-grade steel housing protects internal gauge blocks against deflection and shop floor damage.
Dual-Direction Reference: Measures both top and bottom step faces without altering tool position.
Fast Calibration Cycles: Reduces CMM verification times compared to wringing individual gauge blocks.
ISO Audit Compliance: Delivers clear measurement traceability required for strict ISO/IEC quality standards.
Common Quality Control Applications
Metrology technicians rely on master step gauges for vital calibration duties:
CMM Accuracy Verification: Verify linear position accuracy and volumetric performance on coordinate measuring machines.
Height Gauge Calibration: Test height gauge accuracy across full travel distances in minutes.
Routine Facility Audits: Conduct interval checks between official lab calibrations to prevent quality errors.
How to Conduct a Calibration Check in 4 Steps
Follow these basic steps to ensure accurate tool verification:
Clean the Working Surfaces: Wipe step faces gently using isopropyl alcohol and lint-free clothes.
Acclimate the Unit: Allow the gauge to equalize with your inspection room's ambient temperature.
Align the Probe: Position your measuring probe square to the step surfaces.
Compare Test Readings: Record sequential point measurements and compare results against certified values.
Final Thoughts
The Check Master prevents costly measurement errors across your manufacturing process. By verifying equipment performance in-house, this durable reference standard protects product quality and maintains total customer confidence.
Designed to check accuracy of table movement of machine tools and calibrate CMM
Can used in either vertical or horizontal
Master Layouts: The Machinist’s Combination Square Set
Professional combination square set for layout and measurement work.
Achieving exact angles and straight reference lines presents daily challenges for woodworkers and machinists. Carrying multiple single-purpose measuring tools clutters your workbench quickly. A versatile combination square set solves this issue by integrating four essential measuring functions into one compact system.
This guide explains how a complete combination set elevates layout accuracy across your workshop.
What Is a Combination Square Set?
A combination square set features a grooved steel blade and interchangeable cast heads.
By sliding different heads along the blade, craftsmen transform one tool into a square, mitre gauge, protractor, or center finder. A knurled brass lock bolt secures each head tightly at any point along the rule.
Key Attachments and Their Uses
A standard 4-piece combination set includes three specialized heads:
Square Head: Features 90-degree and 45-degree faces for checking right angles, laying out mitres, and setting depth gaps.
Protractor Head: Revolves 180 degrees in both directions to measure and transfer custom angles accurately.
Center Head: Locates the exact center point on round stock and cylindrical shafts effortlessly.
Precision Steel Rule: Serves as the main guide track, straightedge, and depth scale.
Common Workshop Applications
Craftsmen across metalworking and carpentry rely on combination sets for daily tasks:
Machining Layout: Scribe accurate 90-degree and 45-degree reference lines directly onto metal stock.
Finding Shaft Centers: Position the center head over bar stock to mark drill center points quickly.
Checking Bevel Angles: Use the protractor head to verify angular cuts on milled parts.
Machine Tool Setup: Measure blade height on table saws and check fence squareness on jointers.
How to Maintain Your Set in 3 Steps
Follow these simple rules to ensure long-term measuring accuracy:
Keep the Groove Clean: Wipe metal shavings and dust out of the blade track regularly.
Avoid Overtightening: Snug the lock nut firmly without forcing the thumb screw threads.
Store in a Protective Case: Keep components stored flat in a fitted box to protect ground reference surfaces.
Final Thoughts
A combination square set replaces multiple bulky measuring instruments with one reliable system. By adding this versatile tool to your workshop, you streamline layout tasks, improve cutting accuracy, and elevate overall build quality.
Three heads are attachable to the stainless steel rule (Blade)
allowing versatile measrements on various types of workpieces
Master Layouts: The Machinist’s Combination Square Set
Professional combination square set for layout and measurement work.
Achieving exact angles and straight reference lines presents daily challenges for woodworkers and machinists. Carrying multiple single-purpose measuring tools clutters your workbench quickly. A versatile combination square set solves this issue by integrating four essential measuring functions into one compact system.
This guide explains how a complete combination set elevates layout accuracy across your workshop.
What Is a Combination Square Set?
A combination square set features a grooved steel blade and interchangeable cast heads.
By sliding different heads along the blade, craftsmen transform one tool into a square, mitre gauge, protractor, or center finder. A knurled brass lock bolt secures each head tightly at any point along the rule.
Key Attachments and Their Uses
A standard 4-piece combination set includes three specialized heads:
Square Head: Features 90-degree and 45-degree faces for checking right angles, laying out mitres, and setting depth gaps.
Protractor Head: Revolves 180 degrees in both directions to measure and transfer custom angles accurately.
Center Head: Locates the exact center point on round stock and cylindrical shafts effortlessly.
Precision Steel Rule: Serves as the main guide track, straightedge, and depth scale.
Common Workshop Applications
Craftsmen across metalworking and carpentry rely on combination sets for daily tasks:
Machining Layout: Scribe accurate 90-degree and 45-degree reference lines directly onto metal stock.
Finding Shaft Centers: Position the center head over bar stock to mark drill center points quickly.
Checking Bevel Angles: Use the protractor head to verify angular cuts on milled parts.
Machine Tool Setup: Measure blade height on table saws and check fence squareness on jointers.
How to Maintain Your Set in 3 Steps
Follow these simple rules to ensure long-term measuring accuracy:
Keep the Groove Clean: Wipe metal shavings and dust out of the blade track regularly.
Avoid Overtightening: Snug the lock nut firmly without forcing the thumb screw threads.
Store in a Protective Case: Keep components stored flat in a fitted box to protect ground reference surfaces.
Final Thoughts
A combination square set replaces multiple bulky measuring instruments with one reliable system. By adding this versatile tool to your workshop, you streamline layout tasks, improve cutting accuracy, and elevate overall build quality.
Three heads are attachable to the stainless steel rule (Blade)
allowing versatile measrements on various types of workpieces
Precision Calibration: The Metrologist’s Guide to Depth Micro Checker
Depth Micro Checker reference standard for depth micrometer calibration.
Maintaining strict accuracy on depth measurements remains vital across metalworking and precision engineering. Over time, spindle wear and thermal expansion cause depth gauges to drift. The Depth Micro Checker resolves this metrology challenge by providing a dedicated reference standard to calibrate depth micrometers efficiently.
This guide explains how integrating a master depth checker elevates your inspection lab accuracy.
What Is a Depth Micro Checker?
A Depth Micro Checker is a specialized calibration fixture featuring a stack of permanently housed gauge blocks.
Engineers ground these precision steel reference blocks in precise 25 mm or 1-inch increments. Technicians place depth micrometers directly on the reference anvil to verify spindle travel accuracy across the full range.
Key Operational Advantages
Adding a master depth checker to your toolroom offers clear technical benefits:
High Calibration Precision: Features sub-micron reference step accuracy down to 0.001 mm or 0.00005 inches.
Fast Verification Cycles: Speeds up routine calibration compared to wringing individual gauge blocks manually.
ISO Audit Traceability: Provides verified measurement standards required for strict ISO/IEC quality compliance audits.
Common Quality Control Applications
Metrology technicians and quality inspectors rely on depth checkers for essential daily tasks:
Depth Micrometer Calibration: Verify digital and mechanical depth micrometers before issuing tools to machinists.
Depth Caliper Verification: Check slide accuracy on vernier, dial, and electronic depth calipers.
Routine Shop Audits: Conduct interval calibration checks on active shop floor inspection instruments.
Toolroom Maintenance: Detect rod wear or zero-setting errors on interchangeable micrometer extension rods.
How to Calibrate in 4 Easy Steps
Follow these simple steps to verify depth micrometer performance accurately:
Clean Contact Surfaces: Wipe the checker reference steps and micrometer base using lint-free cloths.
Thermal Equalization: Allow the checker to acclimate to your lab's ambient room temperature.
Seat the Base: Rest the micrometer base flat against the top reference surface firmly.
Compare Readings: Extend the rod to touch target steps and record deviations against reference values.
Final Thoughts
The Depth Micro Checker prevents costly machining errors caused by worn measuring tools. By verifying depth micrometer accuracy in-house, this durable standard maintains top quality standards across your facility.
Designed to check and help set the range end points of a depth micrometer
Precision Calibration: The Metrologist’s Guide to Depth Micro Checker
Depth Micro Checker reference standard for depth micrometer calibration.
Maintaining strict accuracy on depth measurements remains vital across metalworking and precision engineering. Over time, spindle wear and thermal expansion cause depth gauges to drift. The Depth Micro Checker resolves this metrology challenge by providing a dedicated reference standard to calibrate depth micrometers efficiently.
This guide explains how integrating a master depth checker elevates your inspection lab accuracy.
What Is a Depth Micro Checker?
A Depth Micro Checker is a specialized calibration fixture featuring a stack of permanently housed gauge blocks.
Engineers ground these precision steel reference blocks in precise 25 mm or 1-inch increments. Technicians place depth micrometers directly on the reference anvil to verify spindle travel accuracy across the full range.
Key Operational Advantages
Adding a master depth checker to your toolroom offers clear technical benefits:
High Calibration Precision: Features sub-micron reference step accuracy down to 0.001 mm or 0.00005 inches.
Fast Verification Cycles: Speeds up routine calibration compared to wringing individual gauge blocks manually.
ISO Audit Traceability: Provides verified measurement standards required for strict ISO/IEC quality compliance audits.
Common Quality Control Applications
Metrology technicians and quality inspectors rely on depth checkers for essential daily tasks:
Depth Micrometer Calibration: Verify digital and mechanical depth micrometers before issuing tools to machinists.
Depth Caliper Verification: Check slide accuracy on vernier, dial, and electronic depth calipers.
Routine Shop Audits: Conduct interval calibration checks on active shop floor inspection instruments.
Toolroom Maintenance: Detect rod wear or zero-setting errors on interchangeable micrometer extension rods.
How to Calibrate in 4 Easy Steps
Follow these simple steps to verify depth micrometer performance accurately:
Clean Contact Surfaces: Wipe the checker reference steps and micrometer base using lint-free cloths.
Thermal Equalization: Allow the checker to acclimate to your lab's ambient room temperature.
Seat the Base: Rest the micrometer base flat against the top reference surface firmly.
Compare Readings: Extend the rod to touch target steps and record deviations against reference values.
Final Thoughts
The Depth Micro Checker prevents costly machining errors caused by worn measuring tools. By verifying depth micrometer accuracy in-house, this durable standard maintains top quality standards across your facility.
Designed to check and help set the range end points of a depth micrometer
Precision Angle Inspection: Digital Universal Protractor 187 Series
Measuring complex angles accurately presents daily challenges on the machine shop floor. Manual vernier protractors slow down inspection routines and invite human parallax errors. The DIGITAL UNIVERSAL PROTRACTOR 187 series solves this metrology challenge by displaying instant, high-precision angular readings on an easy-to-read electronic display.
This guide explores how this digital protractor elevates angle measurement across manufacturing environments.
What Is the Digital Universal Protractor 187 Series?
The 187 series is a high-precision digital angle measuring instrument manufactured by Mitutoyo.
Equipped with a clear LCD screen, this tool measures angles across a full 360-degree range. Technicians mount interchangeable blades to measure internal and external angles on complex machined parts with extreme confidence.
Key Advantages for Machinists
Upgrading to a 187 series protractor delivers clear operational benefits for quality inspectors:
High Resolution: Displays fine angular values down to 1 arc minute or 0.01 degrees.
Data Output Port: Exports real-time measurement data directly to statistical process control (SPC) systems.
Preset and Zero Functions: Sets reference points easily for fast comparative angle measurements.
Versatile Mounting: Attaches securely to height gauges using optional reference holders for expanded capability.
Common Shop Floor Applications
Inspectors and machinists rely on the 187 series protractor for critical daily tasks:
Tooling and Die Inspection: Verify precise draft angles and chamfer edges on press tooling.
Machined Part Layout: Measure compound angles on milled components before secondary machining.
Blade and Vane Inspection: Check turbine blade pitch angles in aerospace manufacturing.
Height Gauge Integration: Combine with height gauge stands for accurate surface plate inspection.
How to Measure Angles in 4 Easy Steps
Follow these simple steps to perform accurate angle measurements:
Attach the Blade: Lock the correct blade length into the main protractor body.
Set Reference Zero: Place the reference surfaces flat against a master square and press zero.
Align with Workpiece: Position the blade and base flush against your target component surfaces.
Read the Value: Note the precise digital angle displayed on the backlit screen.
Final Thoughts
The DIGITAL UNIVERSAL PROTRACTOR 187 series converts complex angle checks into simple, error-free tasks. By accelerating inspection routines, this reliable tool protects quality and keeps production moving smoothly.
Can be attached to height gages using a gage holder
Setting preset value
Removable blade
Precision Angle Inspection: Digital Universal Protractor 187 Series
Measuring complex angles accurately presents daily challenges on the machine shop floor. Manual vernier protractors slow down inspection routines and invite human parallax errors. The DIGITAL UNIVERSAL PROTRACTOR 187 series solves this metrology challenge by displaying instant, high-precision angular readings on an easy-to-read electronic display.
This guide explores how this digital protractor elevates angle measurement across manufacturing environments.
What Is the Digital Universal Protractor 187 Series?
The 187 series is a high-precision digital angle measuring instrument manufactured by Mitutoyo.
Equipped with a clear LCD screen, this tool measures angles across a full 360-degree range. Technicians mount interchangeable blades to measure internal and external angles on complex machined parts with extreme confidence.
Key Advantages for Machinists
Upgrading to a 187 series protractor delivers clear operational benefits for quality inspectors:
High Resolution: Displays fine angular values down to 1 arc minute or 0.01 degrees.
Data Output Port: Exports real-time measurement data directly to statistical process control (SPC) systems.
Preset and Zero Functions: Sets reference points easily for fast comparative angle measurements.
Versatile Mounting: Attaches securely to height gauges using optional reference holders for expanded capability.
Common Shop Floor Applications
Inspectors and machinists rely on the 187 series protractor for critical daily tasks:
Tooling and Die Inspection: Verify precise draft angles and chamfer edges on press tooling.
Machined Part Layout: Measure compound angles on milled components before secondary machining.
Blade and Vane Inspection: Check turbine blade pitch angles in aerospace manufacturing.
Height Gauge Integration: Combine with height gauge stands for accurate surface plate inspection.
How to Measure Angles in 4 Easy Steps
Follow these simple steps to perform accurate angle measurements:
Attach the Blade: Lock the correct blade length into the main protractor body.
Set Reference Zero: Place the reference surfaces flat against a master square and press zero.
Align with Workpiece: Position the blade and base flush against your target component surfaces.
Read the Value: Note the precise digital angle displayed on the backlit screen.
Final Thoughts
The DIGITAL UNIVERSAL PROTRACTOR 187 series converts complex angle checks into simple, error-free tasks. By accelerating inspection routines, this reliable tool protects quality and keeps production moving smoothly.
Can be attached to height gages using a gage holder
Setting preset value
Removable blade