CATEGORY:

All Categories

image description

Visual IR Thermometer

FLUKE

view
x

Revolutionizing Temperature Diagnostics

Traditional troubleshooting forces technicians to guess where hidden heat sources originate. Standard spot pyrometers only show a single number without visual context. A visual ir thermometer solves this common industrial challenge. It blends a real digital photograph with a complete thermal heat map.

Key Features of Visual IR Tools

This smart diagnostic instrument brings exceptional clarity to daily maintenance routines.

  • Blended Images: Users overlay thermal heat maps directly onto standard digital pictures.

  • Fast Detection: Technicians spot overheating electrical components and mechanical parts instantly.

  • Easy Operation: Simple point-and-shoot designs require zero complex software training.

Industrial Applications

Maintenance teams rely on visual infrared tools across diverse commercial sectors. Electricians scan distribution panels to locate overloaded circuits before failures happen. Plant engineers check motor bearings and pumps under heavy operating loads. HVAC professionals inspect duct leaks and hidden wiring faults quickly.

Improving Maintenance Efficiency

Clear visuals eliminate guesswork during urgent plant troubleshooting tasks. The bright color screen highlights problem areas immediately for the entire team. Workers save valuable time and reduce costly equipment downtime significantly. Accurate diagnostics prevent unexpected electrical fires and major mechanical breakdowns.

Conclusion

Combining digital photos and thermal imaging transforms field maintenance work. Investing in a reliable diagnostic tool protects critical plant infrastructure from unexpected damage. Upgrade your maintenance kit with modern thermal measurement technology today.

Hot and Cold spots can't hide anymore. Temperature range -10°C - 250°C Thermal heat map identify exact problem location. IR measure spotted area
Buy Now
image description

Temperature Calibrators Fluke 714

FLUKE

view
x

Mastering the Reliable Temperature Calibrators Fluke 714  Thermocouple 

Accurate temperature control keeps industrial processes safe and efficient. Minor sensor errors can compromise product quality and cause costly downtime. Technicians need lightweight, single-function tools to test temperature sensors quickly in demanding field environments. The Fluke 714 thermocouple calibrator delivers outstanding precision, rugged reliability, and simple operation for field calibration work.

What Is the Temperature Calibrators Fluke 714?

The Fluke 714 is a handheld thermocouple temperature calibrator. It measures and simulates nine different thermocouple types, including J, K, T, and E types. Process technicians use this compact device to test temperature transmitters, panel meters, and control loops without carrying heavy benchtop equipment.

Key Benefits for Field Technicians

Using a dedicated handheld calibrator improves field workflow efficiency:

  • Exceptional Accuracy: High-precision electronics deliver reliable millivolt sourcing and measurement for critical temperature loops.

  • Rugged Field Design: The heavy-duty yellow protective holster withstands accidental drops and harsh industrial environments.

  • Simple Interface: Intuitive push buttons allow technicians to select thermocouple types and step through values quickly.

  • Clear Dual Units: The backlit display shows temperature values in Celsius or Fahrenheit alongside raw millivolt signals.

Step-by-Step Operation Guide

Calibrate thermocouple loops effectively by following four basic steps:

  1. Connect Test Leads: Plug the mini-thermocouple connector into the input/output jack on the top panel.

  2. Select Thermocouple Type: Press the TYPE button to choose the exact sensor configuration matching your transmitter.

  3. Choose Sourcing or Measuring Mode: Toggle between measure mode to check sensor output or source mode to simulate temperatures.

  4. Apply Signals and Log Data: Step through key temperature points using the decade buttons and compare values against your loop display.

Maintenance Tips for Field Longevity

Protect your calibrator with routine care habits. Clean the outer casing with a damp cloth and mild detergent. Check test lead connectors regularly for oxidation or bent pins. Remove the 9V alkaline battery before long storage periods to prevent corrosive battery leaks.

Investing in a Fluke 714 streamines field calibration, eliminates temperature reading errors, and maintains high process standards across every industrial facility.

Measure temperature from TC output Simulate TC output Operable with nine types of thermocouples Calibrate linear TC transmitter with mV source function. Selectable °F or °C Thermocouple mini-jack termination
Buy Now
image description

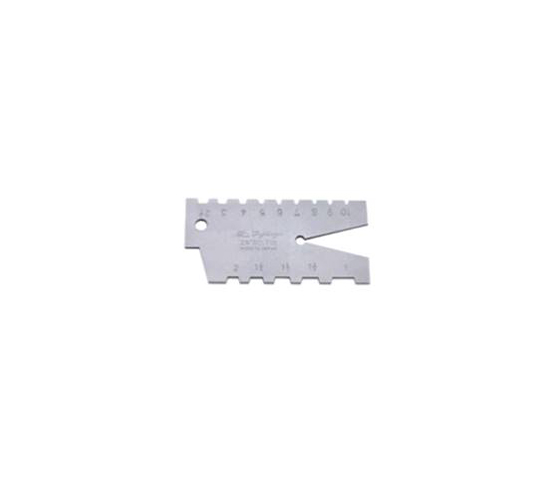
ACME Screw Pitch Gage

FUJI TOOL

view
x

Mastering the ACME Screw Pitch Gage: Essential Tool for Heavy-Duty Threads

Trapezoidal ACME threads power lead screws, lathe components, and heavy machinery jacks. Checking these 29-degree thread profiles requires dedicated inspection tools. Using incorrect thread pitches risks damaging expensive mating nuts and drive shafts. An ACME Screw Pitch Gage delivers a quick, reliable method to verify thread sizes before final machine assembly.

What Is an ACME Screw Pitch Gage?

An ACME screw pitch gage is a compact measuring tool with precision-ground steel leaves. Each leaf features a stamped trapezoidal profile matching specific threads per inch (TPI). Machinists fit the notched leaves directly into thread grooves, comparing the tool profile against the workpiece to verify exact pitch and angle geometry.

Key Benefits for Machining Shops

Using a dedicated ACME pitch gage speeds up quality control and assembly workflows:

  • Fast Pitch Identification: Machinists identify unknown thread sizes in seconds without complex setup steps or optical tools.

  • Accurate 29-Degree Profiling: Precision-cut leaves ensure exact alignment with standard 29-degree ACME thread sidewalls.

  • Compact Steel Housing: Folding leaf designs protect individual blades inside a durable steel casing during shop storage.

  • Cost-Effective Quality Control: Prevents expensive machining mistakes by catching incorrect thread pitches early.

How to Use an ACME Pitch Gage

Follow four basic steps to verify screw threads accurately:

  1. Clean the Workpiece: Wipe oil, metal shavings, and debris from the thread grooves with a wire brush.

  2. Select a Reference Leaf: Choose a leaf matching your target threads per inch rating.

  3. Mesh with the Thread: Insert the leaf teeth directly into the screw thread grooves.

  4. Check for Light Gaps: Hold the assembly up to a light source to check for gaps along the 29-degree flank walls.

Maintenance Practices for Long Life

Keep your pitch gage accurate with simple daily habits. Wipe each leaf clean after every shift to remove abrasive metal dust. Apply a thin coating of anti-rust oil before folding the blades into the protective steel sleeve. Store the tool in a dry cabinet away from humidity.

Using an ACME Screw Pitch Gage prevents assembly errors, protects mating hardware, and maintains high precision across every heavy-duty machining job.

Material : Stainless Steel Thickness : 0.8mm Unit in mm or inch
Buy Now
image description

Screw Pitch Gage

FUJI TOOL

view
x

Mastering the Screw Pitch Gage: Fast & Accurate Thread Identification

Identifying correct thread sizes is critical for secure mechanical assembly. Matching wrong threads damages mating fasteners, strips tapped holes, and causes costly equipment downtime. Machinists need a fast, reliable method to verify thread counts before assembly. A Screw Pitch Gage provides the perfect pocket-sized solution for quick, accurate thread identification on the shop floor.

What Is a Screw Pitch Gage?

A screw pitch gage is a compact measuring tool featuring multiple folding steel leaves. Each leaf contains precision-cut teeth stamped with a specific thread-per-inch or millimeter pitch value. Operators fit the leaf teeth directly into screw threads, matching the profile visually to determine exact pitch and thread family instantly.

Top Advantages for Quality Control

Adding a pitch gage to your toolkit offers clear operational benefits:

  • Rapid Thread Identification: Identifies unknown metric or imperial thread sizes in seconds without complex setup equipment.

  • Wide Pitch Ranges: Folding leaf sets cover broad ranges of coarse and fine thread sizes within a single compact tool.

  • Prevents Assembly Damage: Catching mismatched thread pitches early protects expensive tapped components from stripping.

  • Durable Steel Build: Hardened steel leaves resist bending, wear, and corrosion in harsh machining environments.

Step-by-Step Operation Guide

Verify screw threads accurately by following four simple steps:

  1. Clean the Fastener: Wipe dirt, grease, and metal filings from the thread grooves using a clean wire brush.

  2. Select a Test Leaf: Estimate the thread size and unfold a corresponding leaf from the protective housing.

  3. Mesh Teeth into Threads: Press the leaf teeth firmly into the screw grooves along the central axis.

  4. Inspect for Light Gaps: Hold the tool toward a light source to ensure no light passes between the teeth and thread flanks.

Maintenance Tips for Lasting Accuracy

Protect your pitch gage with simple maintenance habits. Wipe each leaf with a dry cloth after every shift to remove abrasive grit. Apply a light film of anti-rust oil before folding the leaves back into the handle. Store the instrument in a dry toolbox to prevent rust.

Using a Screw Pitch Gage eliminates assembly guesswork, prevents damaged hardware, and maintains high precision standards across every machining project.

29° (Inch) or 30° metric angle
Buy Now
image description

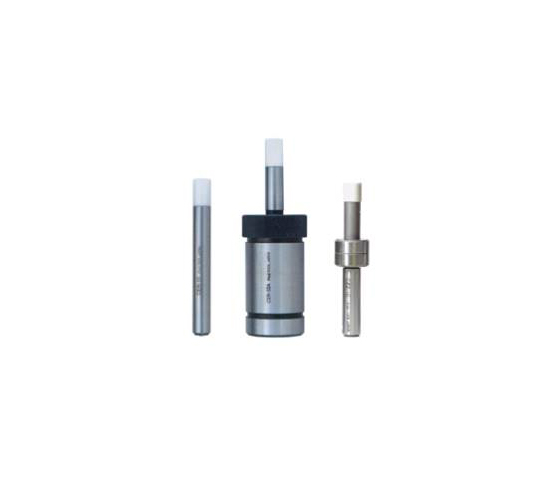
Edge Finder Ceramic

FUJI TOOL

view
x

Mastering Edge Finder Ceramic: Achieve Precision CNC Machine Setups

Accurate datum positioning forms the foundation of precision CNC machining. Finding exact workpiece edges quickly saves valuable machine setup time. Traditional steel edge finders can magnetize, attracting metal swarf that distorts zero alignment points. Using Edge Finder Ceramics solves this problem directly. Ceramic contacts offer high wear resistance, non-magnetic properties, and superior measurement accuracy for modern machine shops.

What Is an  Edge Finder Ceramic ?

A ceramic edge finder is a high-precision positioning tool used on milling machines and CNC machining centers. It features a hardened shank connected to a smooth ceramic contact probe via an internal spring. Machinists rotate the tool in a spindle, bringing the ceramic tip slowly against a workpiece edge until it jumps sideways to indicate exact alignment.

Key Benefits for CNC Machinists

Upgrading to edge finders ceramic yields immediate performance advantages:

  • Non-Magnetic Performance: Ceramic material prevents magnetic attraction, keeping metal chips and swarf off the contact probe.

  • High Wear Resistance: Extremely hard ceramic probes resist abrasive wear, maintaining original tip dimensions through thousands of setup cycles.

  • Anti-Galling Properties: Ceramic tips will not fuse or gall against soft metals like aluminum or brass during contact checks.

  • Corrosion Resistance: Ceramic components withstand harsh water-soluble coolants and synthetic machining oils completely.

Step-by-Step Setup Guide

Achieve precise edge alignments by following four basic steps:

  1. Mount the Tool: Insert the shank firmly into your milling collet or tool holder.

  2. Set Spindle Speed: Run the spindle at a low speed, typically between 400 and 600 RPM.

  3. Approach the Edge: Move the spinning probe slowly toward the workpiece until the ceramic tip runs concentric.

  4. Locate the Offset: Advance the axis carefully until the tip snaps off-center, then add the probe radius to establish your X or Y zero datum.

Essential Care Practices

Protect your ceramic tool with simple daily maintenance. Wipe the ceramic contact probe with a dry microfiber cloth to remove oily residue. Avoid dropping the tool, as impact shock can crack the ceramic tip. Store the instrument in its protective plastic box when not in use.

Choosing Edge Finder Ceramics eliminates swarf interference, speeds up CNC positioning, and maintains tight tolerance accuracy across every machining setup.

Apllication with Milling, Boring, Jig grinder, NC-zero machine positioning Material : SKS-4 Hardness over HRC60 Accracy is witjin 0.002mm
Buy Now
image description

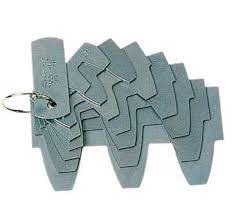
GEAR TOOTH GAGES FTMP

FUJI TOOL

view
x

Maximize Machining Precision with Gear Tooth Gages FTMP

Identifying the exact module or diametral pitch of an unknown gear can stall any repair job. Mechanical workshops require fast, pinpoint accuracy to prevent costly component mismatches. Gear Tooth Gages FTMP provide the perfect manual solution, allowing technicians to check involute profiles instantly.

Why Use the FTMP Gear Tooth Gage Series?

Machinists and fleet mechanics worldwide trust this specific tool line because it simplifies complex dimensional verification.

  • Dual Angle Availability: The series offers precise leaf profiles for both 14.5 deg and 20deg pressure angles.

  • Broad Measuring Ranges: Select from small pitch variants (0.5mm to 5.0 mm) or larger module sets up to 12.0 mm.

  • High Accuracy Standards: Every hardened steel blade delivers a strict accuracy tolerance of up to +/- 0.05 mm.

  • Rugged Construction: Manufacturers use premium SPCC steel, providing mining-grade durability that resists harsh workshop wear.

Streamline Your Workshop Inspection

Using the Gear Tooth Gages FTMP requires zero electrical power or software calibration. Technicians simply place individual leaves against the unknown gear tooth until the profiles mesh perfectly. This immediate mechanical feedback eliminates guesswork during onsite machinery breakdowns or manufacturing audits.

Pro Tip: Always clean grease from the gear root before testing. Debris accumulation can prevent the gage leaf from seating fully, causing a false pitch reading.


Secure Your Fleet Maintenance Standards

Do not risk gear failure by miscalculating tooth profiles. The Gear Tooth Gages offer a compact, long-lasting, and highly cost-effective addition to any industrial toolkit.

Upgrade your inspection efficiency today. Contact our product distribution team to order your FTMP gage set or request our complete dimensional tools catalog.

with ring holder To determine diametral pitch of involute gear
Buy Now
image description

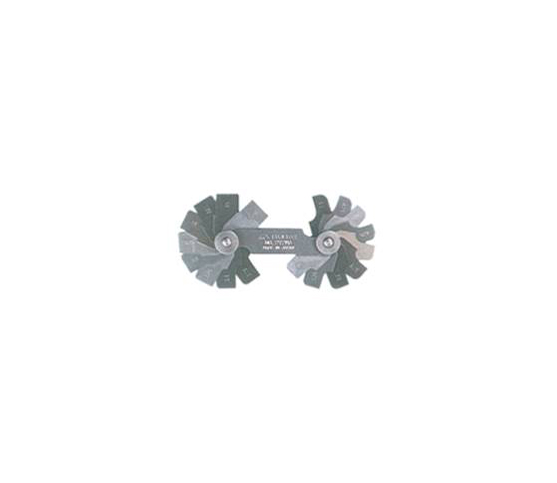
RADIUS GAGES (Tool Steel)

FUJI TOOL

view
x

Ultimate Radius Gages (Tool Steel): Essential Profile Inspection Tools

Machining curved corners and rounded profiles demands total accuracy. Mismatched radii lead to weak stress points, poor part fitment, and costly scrap rates. Inspectors need quick, reliable methods to measure internal and external curves directly on the shop floor. Radius Gages (Tool Steel) offer the ideal inspection solution, providing durable reference blades for fast, accurate profile checks.

What Are Radius Gages (Tool Steel)?

Tool steel radius gages are precision-ground measuring tools with convex and concave profiles. Manufacturers craft these leaves from high-grade tool steel to resist bending, chipping, and wear. Each leaf features stamped radius dimensions. Machinists place the blades against curved workpieces to verify exact radii through simple visual light tests.

Key Benefits for Precision Machining

Using durable tool steel radius gages improves quality control workflows:

  • Exceptional Durability: Premium tool steel resists abrasive metal wear, preserving accurate blade profiles over long inspection cycles.

  • Dual-Profile Checking: Individual leaves check both internal fillets and external rounded corners easily.

  • Wide Size Selection: Sets cover broad ranges of fractional, decimal, or metric sizes in a single compact holder.

  • Clear Markings: Stamped size dimensions eliminate operator confusion and speed up routine part checks.

How to Use Tool Steel Radius Gages

Follow four basic steps to verify curved part profiles accurately:

  1. Clean the Workpiece: Wipe cutting oil, dust, and metal filings off the workpiece curve with a microfiber cloth.

  2. Select the Target Leaf: Choose a gage leaf matching your target drawing specification.

  3. Align Against the Curve: Press the concave or convex blade profile firmly against the workpiece surface.

  4. Inspect Light Gaps: Hold the assembly toward a light source to check for gaps along the curved edge.

Essential Care and Maintenance

Protect your tool steel gage set with simple care practices. Wipe each leaf clean with a dry cloth after every shift. Apply a thin film of anti-rust oil before storing the leaves inside their protective vinyl sleeve. Store the set in a dry cabinet away from high humidity to prevent rust.

Investing in Radius Gages (Tool Steel) speeds up inspection routines, eliminates profile errors, and maintains consistent manufacturing quality across every production project.

Avaliable for Inch or Metric
Buy Now
image description

RADIUS GAGES (Stainless steel)

FUJI TOOL

view
x

Best Radius Gages (Stainless Steel): Corrosion-Resistant Profile Checks

Verifying curved corners and rounded edges requires total accuracy during part production. Mismatched radii create structural weaknesses, poor component fitment, and unexpected assembly delays. Quality teams need reliable inspection tools that withstand harsh workshop environments without rusting. Radius Gages (Stainless steel) provide the perfect inspection solution, offering corrosion-resistant reference blades for fast, accurate profile checks.

What Are Stainless Steel Radius Gages?

Stainless steel radius gages are precision-ground inspection tools featuring convex and concave arc profiles. Manufacturers produce these leaves from premium stainless steel alloys to resist rust, moisture, and chemical corrosion. Each blade contains clearly etched radius dimensions. Machinists place the leaves directly against curved surfaces to confirm exact geometry visually.

Key Benefits for Precision Manufacturing

Using stainless steel radius gages upgrades quality control workflows across busy shop environments:

  • Superior Rust Resistance: Stainless steel construction resists harsh cutting coolants, moisture, and acidic shop environments.

  • Dual Curved Testing: Individual leaves verify both internal corner fillets and external rounded edges easily.

  • High Visual Contrast: Laser-etched size markings remain legible through years of continuous shop floor use.

  • Versatile Size Ranges: Complete sets cover broad selections of fractional, decimal, or metric sizes in one compact pouch.

How to Use Stainless Steel Radius Gages

Verify workpiece curves accurately by following four straightforward steps:

  1. Clean the Test Surface: Wipe coolant, dust, and metal shavings off the curved profile with a microfiber cloth.

  2. Select the Matching Leaf: Choose a gage blade corresponding to your technical drawing specification.

  3. Position Against the Curve: Fit the concave or convex profile snugly against the target workpiece surface.

  4. Check for Light Gaps: Hold the assembly toward a bright light to detect light leaks along the curved contact line.

Essential Maintenance Habits

Keep your stainless steel gage set in top condition with simple care routines. Clean each leaf with a dry lint-free cloth after every shift. Although stainless steel resists corrosion, storing the set inside its vinyl storage case keeps ambient shop grit off precision edges.

Deploying Radius Gages (Stainless steel) speeds up profile checks, prevents corrosion damage, and ensures reliable quality control across every production run.

Range : 0.2 - 50mm or 1/64" - 2" Checking Convex and Concave radius Used for inapection, layout, pattern making and machine jobs. Stainless Steel with Satin-chrome finished Fuji Tool
Buy Now
image description

Precision Thickness Strip or Shim Foil

HASBERG

view
x
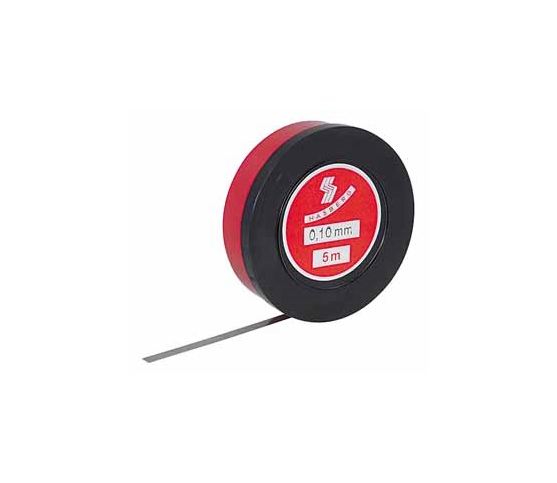
Size : 0.005 to 2.00mm High Carbon and Stainless Steel avaliable Thinkness Tolerance T3 Band steel made from carbon steel or spring band steel is versatile in application. Flexible spring band steel, for example, was required for manufacturing springs, as its name implies. Band steel and spring band steel products are widely used in industrial production in general.
Buy Now
image description

Video Borescope Inspection Camera - BR100

EXTECH

view
x
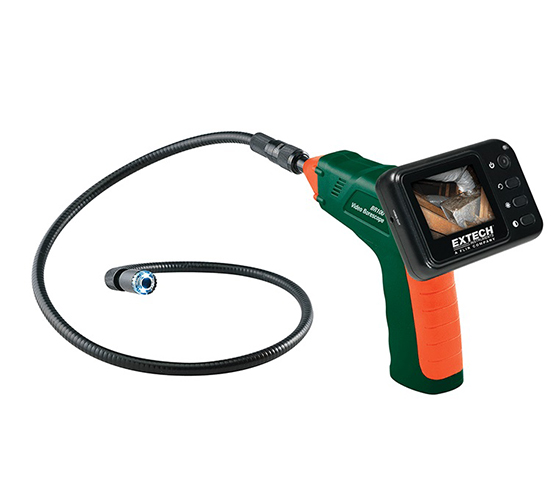
17mm diameter camera head with 39" (1m) flexible gooseneck cable retains configured shape Mini water-proof (IP67) camera head for high resolution viewing Two bright LED lamps with dimmer to illuminate viewed object Glare-free close-up field of view Display detaches for easy storage
Buy Now
image description

WATER QUALITY METERS (Benchtop Stirrer)

EXTECH

view
x

Mastering Water Quality Meters (Benchtop Stirrer): Achieve Fast, Precise Testing

Accurate water testing relies heavily on sample consistency during laboratory analysis. Static liquids cause sensor drift, leading to slow stabilization and erratic pH or conductivity readings. Manual stirring with glass rods introduces human error and risks damaging delicate electrode tips. Laboratory technicians require automated agitation for reliable sample testing. Water Quality Meters (Benchtop Stirrer) integrate magnetic stirring mechanisms directly into testing setups to guarantee uniform sample concentration.

What Are Water Quality Meters (Benchtop Stirrer)?

Water quality meters with benchtop stirrers are laboratory analytical systems that combine multi-parameter sensors with integrated magnetic stirrers. The system uses a motorized base plate to spin a small PTFE magnetic bar inside the liquid beaker. This continuous motion delivers a steady fluid flow across probe sensors without causing splashing or air bubbles.

Key Operational Advantages

Integrating an automated benchtop stirrer into your analytical workflow provides clear performance benefits:

  • Faster Sensor Response: Constant fluid movement accelerates ion exchange at electrode membranes, cutting measurement stabilization time significantly.

  • Eliminates Sample Gradients: Automated stirring mixes dissolved solids and thermal layers uniformly throughout the sample volume.

  • Hands-Free Operation: Technicians record data and adjust calibration settings without holding manual mixing tools.

  • Protects Delicate Probes: Fixed electrode arms hold sensitive glass sensors at a safe distance from spinning magnetic stir bars.

Step-by-Step Operation Guide

Obtain repeatable testing results by following four simple steps:

  1. Prepare the Sample: Pour your test solution into a clean beaker and drop a magnetic stir bar gently onto the bottom.

  2. Position the Sensor: Lower the electrode arm until the sensor tip submerges completely into the liquid without touching the stir bar.

  3. Activate the Stirrer: Turn on the magnetic stirrer control knob to set a smooth, low-vortex mixing speed.

  4. Record Test Data: Allow the measurement reading to stabilize on the digital meter display before logging final values.

Care and Maintenance Practices

Maintain testing accuracy with daily system care habits. Rinse electrodes and magnetic stir bars with distilled water after every test run. Inspect stir bars regularly for worn coatings or exposed metal. Store probes in recommended storage solutions to preserve glass bulb sensitivity.

Investing in Water Quality Meters (Benchtop Stirrer) eliminates testing drift, speeds up laboratory workflows, and delivers uncompromising analytical precision across every sample batch.

  • Large backlit dual LCD simultaneously displays measurement and temperature
  • 2 or 3 point pH calibration for better accuracy (4, 7, and 10pH)
  • Automatic Temperature Compensation
  • Memory stores up to 150 readings
  • Readings can be captured directly to a PC via the built-in USB interface
  • Stirrer with 30, 60 and 120 minute timer or continuous
  • Splash-proof keyboard
  • Complete with pH glass electrode, pH calibration solutions (4 and 7pH), Temperature probe, electrode clamp and rod, software and USB cable, AC adapter and Stirrer; WQ510/WQ530 also include Conductivity cell, Conductivity calibration solutions (1413μS and 12.88mS); WQ530 also includes DO probe, plastic burette, polishing paper , 4 membrane caps and DO internal fill solution (30mL)
Buy Now
image description

Waterproof Thermometer

EXTECH

view
x
Features:
  • 2.75" (70mm) Stainless steel stem
  • °C/°F switchable ranges of -40 to 392°F (-40 to 200°C)
  • MAX/MIN recall of high and low temperatures
  • Data Hold and Auto power Off features
  • Digital display with 0.1° resolution
  • Dimensions: 5.9 x 0.8 x 0.7" (150 x 20 x 18mm); Weight: 0.7oz (20g)
  • Complete with one LR44 button battery and protective cover
Buy Now